W15 <<
Previous Next >> W18
W16
項目1.在Onshape軟體上繪製機械手臂:
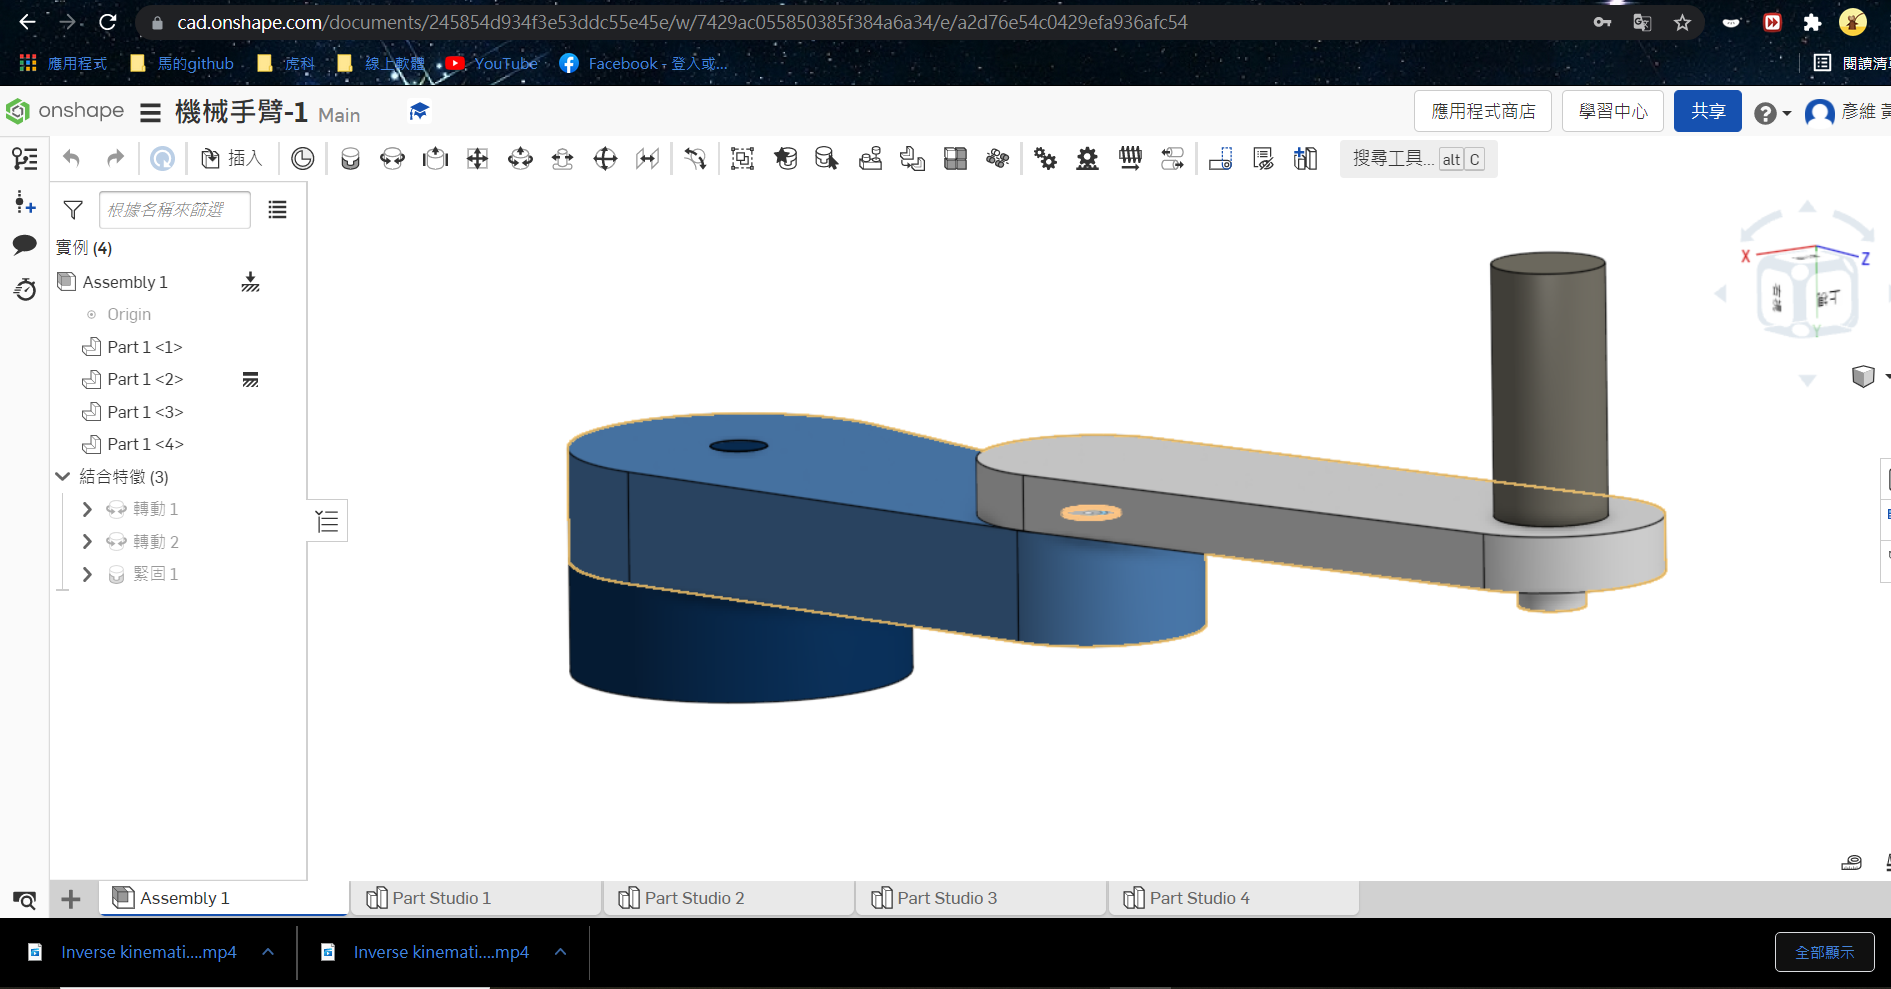
我教大家如何使用Onshape這套繪圖軟體,並順便演示我畫的機械手臂
圖檔網址
這是我的零組件下載點(40823220繪製)
W16零件STL檔(想要STL檔點這裡)
項目2.建立 CoppeliaSim 4.1.0 MTB robot 場景
影片:
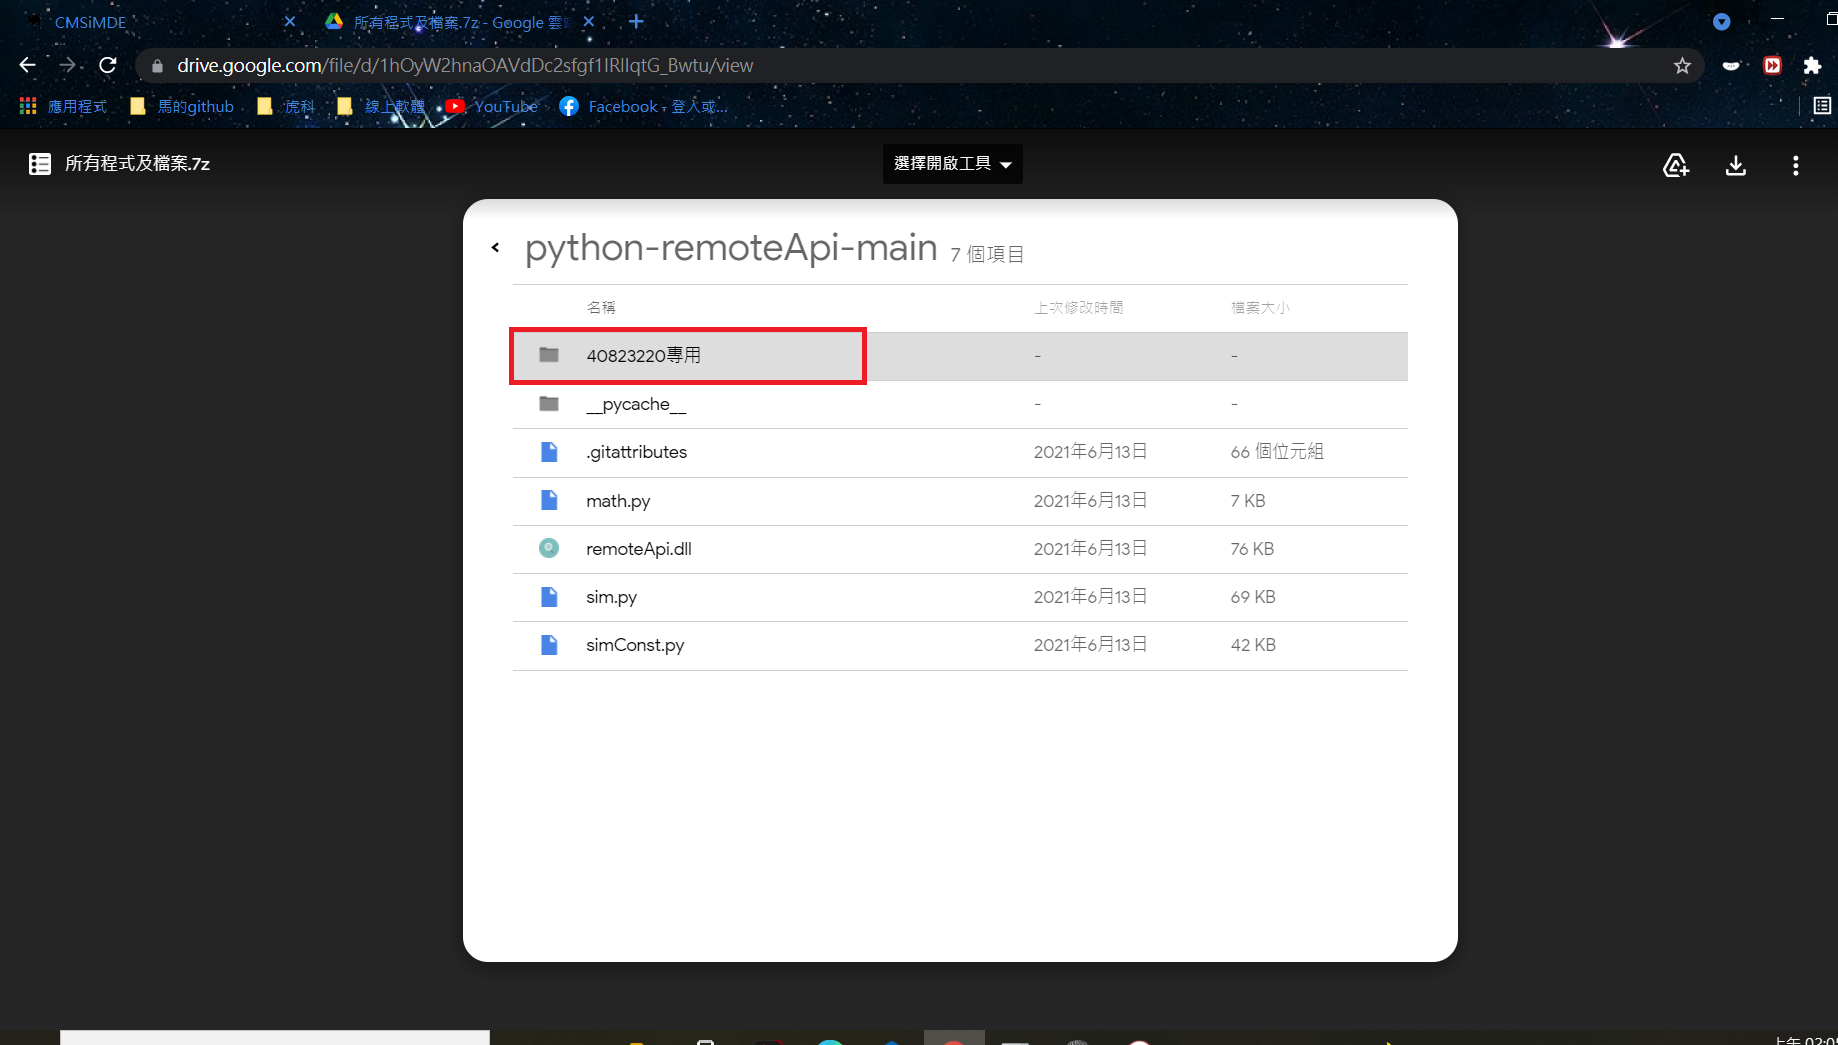
Google Drive:所有項目的檔案
外面放的是我軟體的模擬檔案
要程式的話點選這個資料夾(我的程式都在這裡)
Leo檔:可用鍵盤控制程式
可用鍵盤控制的程式說明:
方向鍵左:軸1左轉、方向鍵右:軸1右轉
方向鍵上:軸2左轉、方向鍵下:軸2右轉
S:吸盤向下、W:吸盤向上並吸取、空白鍵:放下
function sysCall_init()
    joint1=sim.getObjectHandle('joint1')
    joint2=sim.getObjectHandle('joint2')
    jointz=sim.getObjectHandle('jointz')
    joint3=sim.getObjectHandle('joint3')
    sim.setJointTargetPosition(joint1,0)
    sim.setJointTargetPosition(joint2,0)
    sim.setJointTargetPosition(joint3,0)
    sim.setJointTargetPosition(jointz,0)
    deg1=0
    deg2=0
    deg3=0
end

function sysCall_actuation()
    message,auxiliaryData=sim.getSimulatorMessage()
    while message~=-1 do
        if (message==sim.message_keypress) then
            if (auxiliaryData[1]==2009) then
            deg1=deg1+1
            deg3=deg2-deg1
            sim.setJointTargetPosition(joint1,deg1*math.pi/180)
            end
            if (auxiliaryData[1]==2010) then
            deg1=deg1-1
            deg3=deg2-deg1
            sim.setJointTargetPosition(joint1,deg1*math.pi/180)
            end
            if (auxiliaryData[1]==2007) then
            deg2=deg2+1
            deg3=deg1-deg2
            sim.setJointTargetPosition(joint2,deg2*math.pi/180)
            end
            if (auxiliaryData[1]==2008) then
            deg2=deg2-1
            deg3=deg1-deg2
            sim.setJointTargetPosition(joint2,deg2*math.pi/180)
            end
            if (auxiliaryData[1]==115) then
                sim.setJointTargetPosition(jointz,-0.085)
                sim.setIntegerSignal("pad_switch",1)
            end
            if (auxiliaryData[1]==119) then
                sim.setJointTargetPosition(jointz,0)
            end
            if (auxiliaryData[1]==32) then
                sim.setIntegerSignal("pad_switch",0)
            end
            sim.setJointTargetPosition(joint3,deg3*math.pi/180)
        end
    message,auxiliaryData=sim.getSimulatorMessage()
    end
end
(參考老師提供的程式)藉由鍵盤按鍵來控制Robot角度
if (auxiliaryData[1]==114) then --r right turn in degree
                    -- if key r pressed axis1 angle adds 5 degrees
                     rotation1 = rotation1 + 5*deg
                     sim.setJointPosition(axis1, rotation1)
                end -- if r
                if (auxiliaryData[1]==108) then --l left turn in degree
                    -- if key l pressed axis1 angle substract 5 degrees
                     rotation1 = rotation1 - 5*deg
                     sim.setJointPosition(axis1, rotation1)
                end -- if l
                if (auxiliaryData[1]==100) then --d suction pad down
                    -- if key d pressed axis3 will down 0.01 m plus calibration
                     distance3 = distance3 + 0.01 + calibration
                     sim.setJointPosition(axis3, distance3)
                end -- if d
                if (auxiliaryData[1]==117) then --u suction pad up
                    -- if key u pressed axis3 will up 0.01 m minus calibration
                    -- 吸盤往下升 1 公分加上校正值
                     distance3 = distance3 - 0.01 - calibration
                     sim.setJointPosition(axis3, distance3)
                end -- if u
項目3.手臂末端加入 components-gripper-suction pad 吸盤
裡面的驅動程式:
1.因為我的機子比較大所以我的吸盤軸下降高度,我改為-0.085m
2.為了讓他跑迴圈我在中間加了while sim......
3.其他說明,我附在程式裡
function moving(x,y)
    a=0.4 我的第一個手臂-A距離長
    b=0.4 我的第二個手臂-B距離長
    c=math.pow((math.pow(x,2)+math.pow(y,2)),0.5) 算面積
    s=(a+b+c)/2 用海龍公式求解
    area=math.pow((s*(s-a)*(s-b)*(s-c)),0.5)
    h=area/(2*c)
    deg1_base=math.atan(x/y)
    if x<0 and y<0 then
        deg1_base=deg1_base+math.pi 算出來的角度會等於自身角度家徑度
    end
    deg1_tri=math.asin(h/a)
    deg1=deg1_base+deg1_tri
    deg2=math.pi-(0.5*math.pi-deg1_tri)-math.acos(h/b)
    deg3=deg2-deg1
    print(deg1)
    sim.setJointTargetPosition(joint01,deg1)
    sim.setJointTargetPosition(joint02,-deg2)
    sim.setJointTargetPosition(joint03,deg3)
end

function sysCall_threadmain()
    joint01=sim.getObjectHandle('joint1')
    joint02=sim.getObjectHandle('joint2')
    joint03=sim.getObjectHandle('joint3')
    jointz=sim.getObjectHandle('jointz')
    sim.setJointTargetPosition(joint01,0)
    sim.setJointTargetPosition(joint02,0)
    sim.setJointTargetPosition(joint03,0)
    sim.setJointTargetPosition(jointz,0)
    sim.setIntegerSignal("pad_switch",1)
    sim.setJointTargetPosition(jointz,-0.085) 這裡是吸取東西的指令開始點
    sim.wait(2) 等兩秒
    sim.setJointTargetPosition(jointz,0) 吸取東西的指令終止點
    while sim.getSimulationState()~=sim.simulation_advancing_abouttostopre do
    moving(0.2,0.7) 到這個指定的座標
    sim.wait(2)
    sim.setIntegerSignal("pad_switch",0)吸盤關掉 (把方塊往下丟)
    sim.wait(2)
    sim.setIntegerSignal("pad_switch",1) 吸盤打開
    sim.setJointTargetPosition(jointz,-0.085) 再一次向下-0.085吸取東西
    sim.wait(2)
    sim.setJointTargetPosition(jointz,0)
    sim.wait(2)
    moving(-0.3,-0.55)
    sim.wait(2)
    sim.setIntegerSignal("pad_switch",0)
    sim.wait(2)
    sim.setIntegerSignal("pad_switch",1)
    sim.setJointTargetPosition(jointz,-0.085)
    sim.wait(2)
    sim.setJointTargetPosition(jointz,0)
    sim.wait(2)
    end
end
這是吸盤的程式,感謝40823214熱心的指導,讓我能理解並使用他
    maxPullForce=sim.getScriptSimulationParameter(sim.handle_self,'maxPullForce')
    maxShearForce=sim.getScriptSimulationParameter(sim.handle_self,'maxShearForce')
    maxPeelTorque=sim.getScriptSimulationParameter(sim.handle_self,'maxPeelTorque')

    sim.setLinkDummy(l,-1)
    sim.setObjectParent(l,b,true)
    m=sim.getObjectMatrix(l2,-1)
    sim.setObjectMatrix(l,-1,m)
end

function sysCall_cleanup()
    --this is teach by 40823214
    sim.setLinkDummy(l,-1)
    sim.setObjectParent(l,b,true)
    m=sim.getObjectMatrix(l2,-1)
    sim.setObjectMatrix(l,-1,m)
end

function sysCall_sensing()
    parent=sim.getObjectParent(l)
    --this is teach by 40823214
    local sig=sim.getIntegerSignal("pad_switch")
    if (not sig) or (sig==0) then
        if (parent~=b) then
            sim.setLinkDummy(l,-1)
            sim.setObjectParent(l,b,true)
            m=sim.getObjectMatrix(l2,-1)
            sim.setObjectMatrix(l,-1,m)
        end
    else
        if (parent==b) then
            index=0
            while true do
                shape=sim.getObjects(index,sim.object_shape_type)
                if (shape==-1) then
                    break
                end
                local res,val=sim.getObjectInt32Parameter(shape,sim.shapeintparam_respondable)
                if (shape~=b) and (val~=0) and (sim.checkProximitySensor(s,shape)==1) then
                    -- Ok, we found a respondable shape that was detected
                    -- We connect to that shape:
                    -- Make sure the two dummies are initially coincident:
                    sim.setObjectParent(l,b,true)
                    m=sim.getObjectMatrix(l2,-1)
                    sim.setObjectMatrix(l,-1,m)
                    -- Do the connection:
                    sim.setObjectParent(l,shape,true)
                    sim.setLinkDummy(l,l2)
                    break
                end
                index=index+1
            end
        else
            -- Here we have an object attached
            if (infiniteStrength==false) then
                -- We might have to conditionally beak it apart!
                result,force,torque=sim.readForceSensor(suctionPadLink) -- Here we read the median value out of 5 values (check the force sensor prop. dialog)
                if (result>0) then
                    breakIt=false
                    if (force[3]>maxPullForce) then breakIt=true end
                    sf=math.sqrt(force[1]*force[1]+force[2]*force[2])
                    if (sf>maxShearForce) then breakIt=true end
                    if (torque[1]>maxPeelTorque) then breakIt=true end
                    if (torque[2]>maxPeelTorque) then breakIt=true end
                    if (breakIt) then
                        -- We break the link:
                        sim.setLinkDummy(l,-1)
                        sim.setObjectParent(l,b,true)
                        m=sim.getObjectMatrix(l2,-1)
                        sim.setObjectMatrix(l,-1,m)
                    end
                end
            end
        end
    end
end
項目4.逆向運算學函式
主要程式說明:
joint01=sim.getObjectHandle('joint1')設定軸1
    joint02=sim.getObjectHandle('joint2')設定軸2
    joint03=sim.getObjectHandle('joint3')設定軸3
    jointz=sim.getObjectHandle('jointz')設定方軸
    sim.setJointTargetPosition(joint01,0)定位軸1
    sim.setJointTargetPosition(joint02,0)定位軸2
    sim.setJointTargetPosition(joint03,0)定位軸3
    sim.setJointTargetPosition(jointz,0)定位方軸
    sim.setIntegerSignal("pad_switch",1)
    sim.setJointTargetPosition(jointz,-0.085)    吸盤下降0.085
    sim.wait(2)停頓2秒
    sim.setJointTargetPosition(jointz,0)
    sim.wait(2)
    moving(0.2,0.7)以下都是各點要求
    sim.wait(2)
    sim.setIntegerSignal("pad_switch",0)
    sim.wait(2)
    sim.setIntegerSignal("pad_switch",1)
    sim.wait(2)
    sim.setJointTargetPosition(jointz,-0.06)
    sim.wait(2)
    sim.setJointTargetPosition(jointz,0)
    sim.wait(2)
    moving(-0.3,-0.55)
    sim.wait(5)
    sim.setIntegerSignal("pad_switch",0)
    sim.wait(2)
    sim.setIntegerSignal("pad_switch",1)
    sim.wait(2)
    sim.setJointTargetPosition(jointz,-0.06)
    sim.wait(2)
    sim.setJointTargetPosition(jointz,0)
    sim.wait(2)
上面有提到過的程式我再補充說明:(試算角度)
a=0.4 調整a.距離為0.4
b=0.4 調整b.距離為0.4
c=math.pow((math.pow(x,2)+math.pow(y,2)),0.5) 角度計算
s=(a+b+c)/2
area=math.pow((s*(s-a)*(s-b)*(s-c)),0.5)
h=area/(2*c)
deg1_base=math.atan(x/y)
if x<0 and y<0 then
    deg1_base=deg1_base+math.pi
end
deg1_tri=math.asin(h/a)
deg1=deg1_base+deg1_tri
deg2=math.pi-(0.5*math.pi-deg1_tri)-math.acos(h/b)
deg3=deg2-deg1
sim.setJointTargetPosition(joint01,deg1)
sim.setJointTargetPosition(joint02,-deg2)
sim.setJointTargetPosition(joint03,deg3)
項目5.Python remote API 逆向運動學函式
Python程式說明:
(跟前面的差不多意思,有些地方要改,例如:有些end要記得拿掉、下降高度也要記得改)
import sim as vrep
import math
import random
import time
import math

def moving(x,y):
    a=0.4
    b=0.4
    c=math.pow((math.pow(x,2)+math.pow(y,2)),0.5)
    s=(a+b+c)/2
    area=math.pow((s*(s-a)*(s-b)*(s-c)),0.5)
    h=area/(2*c)
    deg1_base=math.atan(x/y)
    if x<0 and y<0 :
        deg_base1=deg1_base+math.pi

    deg1_tri=math.asin(h/a)
    deg1=deg1_base+deg1_tri
    deg2=math.pi-(0.5*math.pi-deg1_tri)-math.acos(h/b)
    deg3=deg2-deg1
    vrep.simxSetJointTargetPosition(clientID,joint01,deg1,opmode)
    vrep.simxSetJointTargetPosition(clientID,joint02,-deg2,opmode)
    vrep.simxSetJointTargetPosition(clientID,joint03,deg3,opmode)

print ('Start')

vrep.simxFinish(-1)

clientID = vrep.simxStart('127.0.0.1', 19997, True, True, 5000, 5)

if clientID != -1:
    print ('Connected to remote API server')

    res = vrep.simxAddStatusbarMessage(
        clientID, "This is teach by 40823214 ",
        vrep.simx_opmode_oneshot)
    if res not in (vrep.simx_return_ok, vrep.simx_return_novalue_flag):
        print("Could not add a message to the status bar.")


    opmode = vrep.simx_opmode_oneshot_wait
    STREAMING = vrep.simx_opmode_streaming


    vrep.simxStartSimulation(clientID, opmode)
    ret,joint01=vrep.simxGetObjectHandle(clientID,"joint1",opmode)
    ret,joint02=vrep.simxGetObjectHandle(clientID,"joint2",opmode)
    ret,joint03=vrep.simxGetObjectHandle(clientID,"joint3",opmode)
    ret,jointz=vrep.simxGetObjectHandle(clientID,"jointz",opmode)

    vrep.simxSetJointTargetPosition(clientID,joint01,0,opmode)
    vrep.simxSetJointTargetPosition(clientID,joint02,0,opmode)
    vrep.simxSetJointTargetPosition(clientID,joint03,0,opmode)
    vrep.simxSetIntegerSignal(clientID,"pad_switch",1,opmode)
    vrep.simxSetJointTargetPosition(clientID,jointz,-0.085,opmode)
    time.sleep(1)
    vrep.simxSetJointTargetPosition(clientID,jointz,0,opmode)

    while True:
        moving(0.2,0.7)
        time.sleep(1)
        vrep.simxSetIntegerSignal(clientID,"pad_switch",0,opmode)
        time.sleep(1)
        vrep.simxSetIntegerSignal(clientID,"pad_switch",1,opmode)
        vrep.simxSetJointTargetPosition(clientID,jointz,-0.085,opmode)吸起來
        time.sleep(1)
        vrep.simxSetJointTargetPosition(clientID,jointz,0,opmode)放下
        moving(-0.3,-0.55)
        time.sleep(1)
        vrep.simxSetIntegerSignal(clientID,"pad_switch",0,opmode)
        time.sleep(1)
        vrep.simxSetIntegerSignal(clientID,"pad_switch",1,opmode)
        vrep.simxSetJointTargetPosition(clientID,jointz,-0.085,opmode)吸起來
        time.sleep(1)
        vrep.simxSetJointTargetPosition(clientID,jointz,0,opmode)
放下
心得:
我只想說對於我這個初學者而言,要在短時間內,弄熟Onshape、Coppeliasim這兩套軟體,難度有點高,重點是還要搭配程式,這真的是個艱難的挑戰,雖然我沒有做得很完整,但至少有個樣子了,我能做到這樣,最大功臣是40823214同學的協助,我一直問,他就一直教,真的很棒。總之,期末這項作業,我學到了很多,我也真的是盡力了。
參與40823214的30人協同的教學影片:
以下是我所有的檔案在這邊也可下載:
項目2-lua程式可用鍵盤控制
項目4-lua程式在軟體內運作
項目5-用Python remote API 驅動 、 搭配的PY程式
W15 <<
Previous Next >> W18